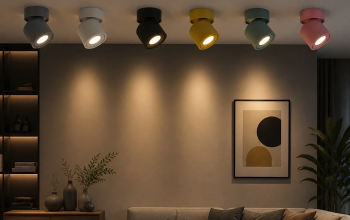
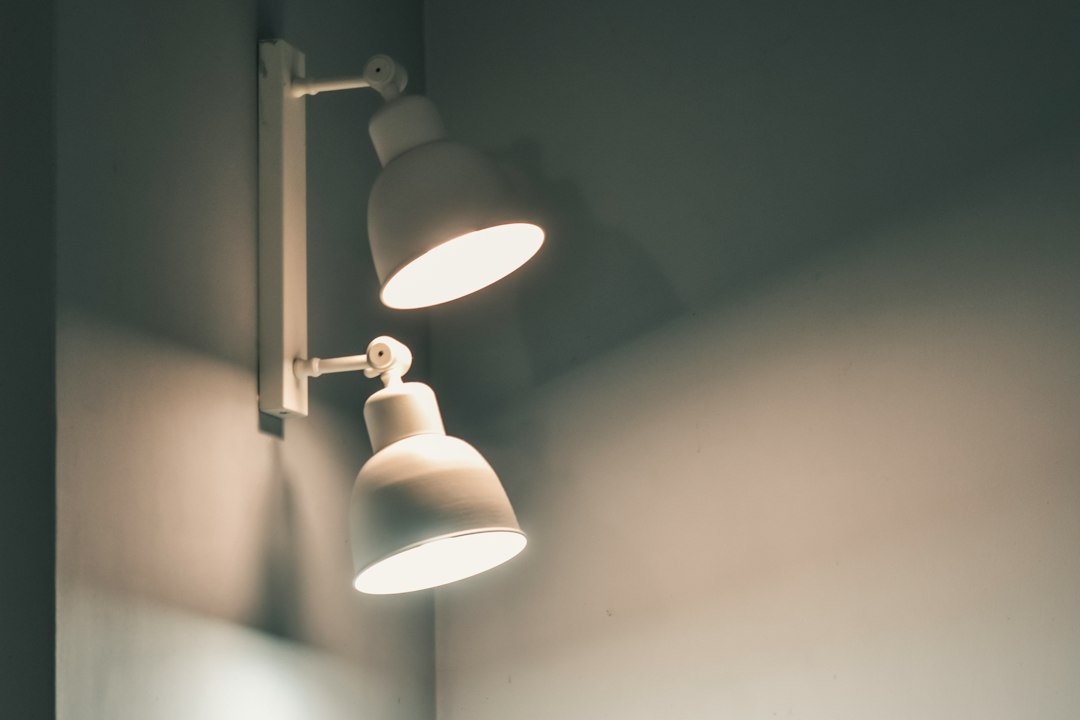
Got a new surface mounted spotlight and wondering how to get it looking just right? You’ve come to the right place. Getting a perfect finish with these fixtures is totally achievable with a bit of planning and care. It’s not just about screwing it to the ceiling; it’s about making sure it blends seamlessly, functions flawlessly, and looks like it was always meant to be there. We’ll walk through everything from choosing the right spot to making those final adjustments, so you can enjoy beautifully lit spaces without any DIY headaches.
Understanding Your Surface Mounted Spotlights
Before you even think about drilling, it’s super helpful to get acquainted with what you’re working with. Surface mounted spotlights, unlike their recessed cousins, sit directly on the surface of your ceiling or wall. This means all their components – the housing, wiring connections, and sometimes even the driver – are visible or accessible from the outside. This design choice offers a lot of flexibility, especially in homes where ceiling cavities are shallow or non-existent, or when you want to add a distinct architectural element.
Types and Components
There’s a good variety out there. You might have a single spotlight head, a track system with multiple adjustable heads, or a more decorative, fixed fixture. Each type has its own installation quirks, but the basic principles of wiring and mounting remain similar.
Typically, a surface mounted spotlight will consist of:
- The fixture housing: This is the main body that encases the internal components and provides the mounting point.
- The light source: This could be an integrated LED module, or a socket for a GU10, MR16, or other bulb type.
- The electrical connector block: Where you connect your home’s wiring.
- The mounting bracket/plate: This is usually fixed to the surface first, and the main fixture then attaches to it.
- Sometimes, an external driver: For certain LED fixtures, a separate driver converts your household voltage to the correct voltage for the LEDs. This driver might be integrated into the fixture or require a small space nearby.
Understanding these parts helps you anticipate the installation process and troubleshoot if anything seems off. For instance, knowing where the driver is located helps you plan for its placement if it’s external, or understand why the fixture might be a bit bulkier if it’s integrated.
Key Considerations Before Installation
A little foresight goes a long way. Before you even open the box, think about a few crucial things:
- Location: Where exactly do you want the light to shine? Will it highlight a piece of art, provide ambient light, or illuminate a workspace? Consider furniture placement, walkways, and the overall purpose of the room.
- Power source: Where will the spotlight draw its power from? Is there an existing junction box you can tap into, or will you need to run new wiring? This is often the trickiest part and might require professional help if you’re not comfortable with electrical work.
- Surface type: What kind of ceiling or wall are you mounting to? Plasterboard (drywall), concrete, wood paneling? This determines the type of fixings you’ll need to ensure a secure installation.
- Weight of the fixture: While most spotlights aren’t incredibly heavy, it’s still good practice to ensure your chosen mounting method can safely support it long-term.
- Aesthetics: How will the fixture look in its intended spot, even when not illuminated? Does it complement the room’s style?
Thinking these points through beforehand can save you a lot of time and potential headaches later on. It’s all about setting yourself up for success from the get-go.
Essential Tools and Safety Precautions
Nobody likes having to stop mid-project to hunt for a missing screwdriver. Gathering your tools and ensuring you’re working safely are two non-negotiable steps. It sets the stage for a smooth installation and, more importantly, keeps you out of harm’s way.
Gathering Your Toolkit
Most of these tools you probably already have lying around, but it’s worth double-checking.
- Screwdrivers: Both Phillips head and flathead, in various sizes. The fixture often comes with specific screw types.
- Drill: A cordless drill is ideal for convenience. Make sure you have the right drill bits for your surface type (e.g., wood, plasterboard, masonry).
- Wire strippers: Essential for cleanly stripping insulation from electrical wires. Don’t try to use pliers or scissors – it’s dangerous and leads to messy connections.
- Pliers: Combination pliers and long-nose pliers can be handy for gripping wires or tightening small nuts.
- Voltage tester / Multimeter: Absolutely critical for verifying that the power is off before you touch any wires. Don’t skip this.
- Measuring tape: For accurate placement and spacing.
- Pencil: For marking drill points and alignment.
- Spirit level: To ensure your fixture is perfectly straight and level.
- Stepladder: A sturdy one! Don’t try to balance on a chair.
- Safety glasses: Protect your eyes from dust and debris, especially when drilling overhead.
- Work gloves: Protect your hands.
- Dust sheet/drop cloth: To catch any dust or debris, making cleanup easier.
Having everything within reach before you start means fewer trips up and down the ladder and a more efficient process.
Prioritizing Electrical Safety
This is where we get serious. Working with electricity can be dangerous if you’re not careful. Always, always, prioritize safety.
- Turn off the power at the breaker: This is the golden rule. Locate your home’s electrical panel and switch off the circuit breaker for the area you’re working in. Don’t just rely on a wall switch, as power can still be present at the fixture itself. If you’re unsure which breaker it is, turn off the main breaker for the entire house. It’s an inconvenience, but a safe one.
- Test for power: Even after you’ve flipped the breaker, always use your voltage tester to confirm there’s no power in the wires you’ll be working with. Touch the probes to the bare ends of the wires you expect to be live. No reading means it’s safe.
- Never work on live wires: Just don’t. It’s not worth the risk of electrocution.
- Insulate connections: Once wired, ensure all bare wire connections are securely housed within the fixture’s terminal block or covered with approved wire connectors (like twist-on caps) and electrical tape if necessary. No exposed copper should be left outside the terminal.
- Grounding: Always connect the ground wire (usually green or bare copper) if one is present in your wiring and on the fixture. This is a critical safety feature that helps prevent electric shock in case of a fault.
- Consult a professional: If at any point you feel unsure or uncomfortable with the electrical aspects, stop and call a qualified electrician. It’s better to pay a professional than to risk injury or damage to your home.
Remember, a perfect finish also means a safe and compliant installation. Don’t cut corners on safety for the sake of speed.
Step-by-Step Installation Process
Okay, tools are ready, safety checks are done, and you’re mentally prepared. Let’s get this spotlight mounted! This general guide covers most surface mounted fixtures, but always refer to your specific product’s instructions as well, as there can be slight variations.
Planning and Marking the Location
This initial step is crucial for achieving that “perfect finish” look. A poorly placed spotlight sticks out like a sore thumb.
- Visualize and measure: Hold the fixture up to your chosen spot. Step back and look at it from different angles. Is it centered? Is it too close to a wall or another fixture? Use your tape measure to ensure symmetry if installing multiple lights or for precise placement relative to architectural features.
- Mark drill points: Most surface mounted spotlights come with a mounting bracket that attaches to the ceiling first. Hold this bracket up to your chosen spot, use a spirit level to ensure it’s straight, and then use your pencil to mark the exact locations for drilling screws. If the bracket has a central hole for wiring, mark that too.
- Confirm wiring access: If you’re connecting to an existing junction box, make sure your marked location allows the fixture to cover the box completely and neatly. If you’re running new wires, you’ll need to carefully plan the path for the cable and make any necessary cuts or holes in the ceiling/wall beforehand, ensuring wires are properly enclosed within conduits or wall cavities.
Take your time here. Erasing a pencil mark is much easier than patching an incorrectly drilled hole.
Mounting the Bracket
This is the foundation of your installation. A securely mounted bracket means a stable fixture.
- Drill pilot holes: Using your drill and the appropriate drill bit for your surface type, carefully drill pilot holes at your marked points. The size of the drill bit should be slightly smaller than the diameter of your mounting screws (or the size specified for your wall plugs/anchors).
- For plasterboard: If not drilling into a joist, you’ll likely need plasterboard anchors (toggle bolts, self-drilling anchors, etc.) for a secure hold. Drill a hole suitable for the anchor.
- For concrete/masonry: Use a hammer drill and a masonry bit, then insert suitable wall plugs.
- For wood: Drill a pilot hole slightly smaller than the screw threads.
- Attach the mounting bracket: Align the bracket with your drilled holes. Insert the screws (or use the chosen anchors) and tighten them securely with your screwdriver. Ensure the bracket is firm and doesn’t wobble. If it does, your anchors might not be properly installed, or the screws aren’t tight enough.
This bracket needs to hold the full weight of your spotlight, so don’t skimp on making it robust.
Wiring the Spotlight
Now for the electrical connections. Remember: POWER OFF!
- Retrieve wires: Gently pull the electrical wires from the ceiling/wall opening through the central hole in your mounting bracket.
- Strip insulation: Using your wire strippers, carefully strip about 1/2 inch to 3/4 inch (1.5 to 2 cm) of insulation from the ends of the house wires (live, neutral, and ground) and the fixture’s wires. Be careful not to nick the copper strands.
- Identify wires:
- Live (Load): Typically brown or red in older wiring, sometimes black in newer installations. This carries the current from the switch.
- Neutral: Usually blue or black in older wiring, sometimes white in newer installations. This completes the circuit.
- Ground (Earth): Usually green/yellow striped or bare copper. This is for safety.
- Connect wires: Most fixtures have a terminal block with clearly labeled connections (L for Live, N for Neutral, E or a ground symbol for Earth).
- Connect Live to Live: Insert the stripped live wire from your home wiring into the ‘L’ terminal on the fixture’s block and tighten the screw securely.
- Connect Neutral to Neutral: Do the same for the neutral wires, connecting them to the ‘N’ terminal.
- Connect Ground to Ground: Connect the ground wire to the ‘E’ or ground terminal. This is vital for safety.
- Double-check connections: Give each wire a gentle tug to ensure it’s firmly seated and won’t pull out. No stray copper strands should be visible outside the terminal.
- Tuck wires: Carefully push the connected wires back into the ceiling cavity or the fixture’s wiring compartment, ensuring they aren’t pinched or stressed. There should be enough slack for slight adjustments but not so much that they interfere with mounting the fixture.
If your fixture has an external driver, connect the house wires to the input side of the driver, and the driver’s output wires to the fixture’s input terminals, following the manufacturer’s instructions for polarity (+/-) if applicable.
Attaching the Spotlight Fixture
With the wiring done, it’s time to bring it all together.
- Align and attach: Carefully align the main spotlight fixture with the mounting bracket you installed earlier. Most fixtures either twist onto the bracket, slot into place and are secured with small screws, or are held by a central bolt.
- Secure the fixture: Use the provided screws or fastening mechanism to firmly attach the fixture to the mounting bracket. Don’t overtighten, especially if working with plastic components, but ensure it’s snug and doesn’t wobble.
- Install bulb (if applicable): If your fixture uses a replaceable bulb (like GU10), insert it now, following the manufacturer’s instructions. Ensure it’s twisted or pushed in all the way.
- Restore power and test: Go back to your circuit breaker panel and switch the power back on. Then, test the light by flipping the wall switch. It should illuminate! If it doesn’t, turn off the power immediately and re-check your wiring connections.
If everything works, you’re almost there!
Achieving That Perfect Finish
Installation isn’t just about functionality; it’s about aesthetics. A perfect finish means the spotlight looks intentional, well-integrated, and simply right. This section focuses on the details that elevate a good installation to a great one.
Adjusting Direction and Aim
Many surface mounted spotlights offer adjustability, which is a fantastic feature for fine-tuning your lighting.
- Observe the beam: Once the light is on, step back and observe where the light beam falls. What is it illuminating? Is it creating unwanted shadows?
- Gentle adjustments: Carefully grasp the spotlight head (if it’s adjustable) and gently pivot or tilt it to direct the light exactly where you want it. Some fixtures have locking screws or tension rings; loosen these slightly before adjusting and tighten them once you’re happy with the angle.
- Experiment: Don’t be afraid to try different angles. A slight change in direction can drastically alter the mood or highlight a different feature in the room. If illuminating artwork, try to find an angle that minimizes glare on the surface of the piece. For general ambient light, aim for a soft wash across a wall or ceiling.
- Multiple spotlights: If you have several spotlights, coordinate their aim. They can be directed to create overlapping pools of light for general illumination, or each can be focused on a specific element for accent lighting. Consistency in how they are aimed, or intentional variation, both contribute to the overall effect.
This step is where your spotlight truly becomes a functional design element, rather than just a light source.
Concealing Wires and Gaps
Exposed wires or unsightly gaps between the fixture and the ceiling are major culprits for a less-than-perfect finish.
- Internal wiring compartment: Most surface mounted fixtures are designed to completely conceal the terminal block and house wires within their base. Ensure all wires are neatly tucked inside this compartment before closing up the fixture. No bare wires or connection blocks should be visible from the outside.
- Tight fit to surface: The base of your fixture should sit flush against the ceiling or wall. If there’s a small gap, it might indicate that:
- The mounting bracket isn’t perfectly flat against the surface.
- The surface itself isn’t completely flat (common in older homes).
- The fixture isn’t tightened down enough.
- Wires are pinched behind the fixture, preventing it from sitting flush.
- Carefully loosen, check for pinched wires, and re-tighten.
- Using caulk (sparingly): For very small, unavoidable gaps (especially against uneven surfaces like textured plaster), a thin bead of paintable acrylic caulk can be used to seal the gap. Apply it carefully with a caulk gun, then smooth it with a wet finger or tool. Let it dry completely before painting it to match the ceiling if desired. This should be a last resort and used minimally to maintain a clean look. Avoid this if the fixture needs to be removed frequently for maintenance.
- Matching color/finish: If your ceiling is a different color from the fixture, any gaps will be more noticeable. Sometimes, carefully painting the caulk line to match the ceiling can help the fixture blend in. However, typically, a well-installed fixture shouldn’t require this.
The goal is for the fixture to look like it’s a seamless part of the surface, not an afterthought.
Final Cleaning and Inspection
You’re nearly done! A little tidying up makes all the difference.
- Clean the fixture: Use a soft, dry, or slightly damp cloth to wipe down the fixture and remove any fingerprints, dust, or smudges from the installation process. For glass or polished surfaces, a microfiber cloth can help prevent streaks.
- Clean the surrounding area: Remove any pencil marks from the ceiling/wall. Vacuum or sweep up any dust or debris from drilling.
- Final visual check: Stand back and admire your work. Does the light look straight? Is it aimed correctly? Are there any obvious blemishes or issues? Is everything securely fastened?
- Functionality check: Turn the light on and off a few times. Listen for any unusual buzzing (though some LED drivers can have a faint hum, it shouldn’t be loud or persistent).
A spotless fixture in a clean space makes the entire installation feel professional and complete.
Troubleshooting Common Installation Issues
Even with the best planning, sometimes things don’t go exactly as expected. Don’t panic! Most common issues have straightforward solutions.
Light Not Turning On
This is probably the most frustrating issue, but usually the easiest to fix.
- No power: Did you remember to flip the breaker back on? Is the wall switch turned on? Sometimes the simplest things are overlooked.
- Loose wiring: Turn off the power at the breaker again. Double-check all wire connections in the terminal block. Is each wire firmly seated? Are the screws tight? A common mistake is not stripping enough insulation or having a loose ground wire causing a circuit interruption (though ground is primarily for safety, a bad connection can sometimes mimic a fault).
- Incorrect wiring: Did you accidentally swap the live and neutral wires? While some lights might still function, it’s not safe or correct. Ensure Live connects to Live, Neutral to Neutral, and Ground to Ground.
- Faulty bulb/LED module: If it’s a replaceable bulb, try a known working bulb in the fixture. If it’s an integrated LED module, it’s less common for it to be faulty right out of the box, but it’s possible.
- Faulty switch: If other lights on the same circuit work, but only this new one doesn’t, the switch controlling it might be the problem, or the wiring to the switch.
Always start with the most obvious and easiest checks before diving into more complex troubleshooting.
Light Flickering
Flickering can be annoying and sometimes indicates a problem.
- Loose connections: Just like with a light not turning on, loose wires (either at the fixture or in the junction box) are a prime suspect. Power off and check all connections carefully.
- Incompatible dimmer switch: If you’re using a dimmer, not all dimmers are compatible with all LED lights. Many LED spotlights require specific LED-compatible dimmers (often leading-edge or trailing-edge, or universal dimmers). Using a standard incandescent dimmer with an LED light can cause flickering, buzzing, or even damage the light. Check the manufacturer’s recommendations for dimmer compatibility.
- Overloaded circuit: Less common for a single spotlight, but if you’ve added many lights to an existing circuit, it could be under strain.
- Faulty LED driver: For LED lights with external drivers, a flickering light can sometimes point to a driver that’s failing or incompatible with the power supply.
- Poor quality bulb/fixture: Unfortunately, sometimes a lower quality product can simply be prone to flickering.
If the issue persists after checking connections and dimmer compatibility, it might be worth trying a different bulb or contacting the fixture’s manufacturer.
Fixture Not Sitting Flush
A gap between the fixture and the ceiling can be an eyesore.
- Pinched wires: The most common culprit. Wires inside the fixture’s compartment or behind the mounting bracket can prevent the fixture from sitting flat. Power off, loosen the fixture, and carefully tuck all wires further into the cavity or compartment, ensuring they are not interfering with the mounting points.
- Uneven surface: Ceilings or walls can sometimes have slight bulges or dips. If the mounting bracket is flat, but the main fixture still has a gap, it’s likely the surface. As mentioned before, a very thin bead of paintable caulk can help, but ensure the fixture is as tight as possible first.
- Debris behind fixture: A small piece of plaster, wood, or other debris caught behind the fixture or bracket can create a gap. Power off, remove the fixture, and thoroughly clean the area.
- Bracket issue: Is the mounting bracket itself warped or not perfectly flat against the surface? This is rare but possible. Re-check the bracket installation.
Patience is key here. Sometimes it takes a couple of attempts to get those wires just right and achieve a truly flush fit.
Maintenance and Longevity Tips
You’ve put in the effort to install your spotlight perfectly; now, let’s make sure it stays that way and lasts for years to come. A little ongoing care goes a long way in preserving both its functionality and its aesthetics.
Regular Cleaning
Dust and grime can accumulate surprisingly quickly, dulling the appearance of your spotlight and, in some cases, even slightly reducing light output.
- Frequency: Aim to clean your spotlights every few months, or more often in dusty environments (e.g., workshops, kitchens).
- Safety first: Always turn off the power at the wall switch before cleaning. For a thorough clean, turning off the circuit breaker is even better, especially if you’re reaching directly into the light housing or changing bulbs.
- Gentle approach:
- For the fixture body: Use a soft, dry microfiber cloth to wipe away dust. For more stubborn grime, slightly dampen the cloth with water (or a mild, non-abrasive cleaner if specified by the manufacturer, but generally water is sufficient) and then wipe dry immediately. Avoid harsh chemicals that could damage the finish.
- For glass or lenses: Again, a soft, clean microfiber cloth is best. If there are smudges, a gentle glass cleaner applied to the cloth (not sprayed directly onto the fixture) can be used, then wipe dry.
- For LED modules: These are usually sealed. Just dust the exterior. Do not attempt to clean the individual LED chips.
- Avoid abrasives: Never use abrasive pads, scouring powders, or harsh chemical cleaners, as these can scratch or corrode the finish of your spotlight.
A clean spotlight looks brighter and maintains its perfect finish longer.
Bulb Replacement (if applicable)
If your fixture uses replaceable bulbs, knowing how to change them correctly ensures you don’t damage the fixture or injure yourself.
- Power off: Always turn off the power before attempting to change a bulb.
- Cool down: Allow the old bulb to cool down completely before touching it. Halogen bulbs, in particular, can get extremely hot.
- Correct bulb type: Always replace with the exact same bulb type (e.g., GU10, MR16, E27) and wattage/LED equivalent specified by the manufacturer. Using an incorrect bulb can damage the fixture or create a fire hazard. Pay attention to the base type, voltage, and whether it’s dimmable if you use a dimmer.
- Handling: For halogen bulbs, avoid touching the glass with your bare hands. The oils from your skin can create hot spots that reduce bulb life. Use a cloth or gloves.
- Secure fit: Ensure the new bulb is inserted fully and twisted/pushed securely into its socket. A loose bulb can cause flickering or intermittent operation.
- Dispose responsibly: Many old bulbs (especially CFLs) contain mercury and should be disposed of at designated recycling centers. LED bulbs, while not toxic, are also recyclable.
Addressing Minor Issues Promptly
Don’t let small problems become big ones.
- Flickering: If you notice flickering, address it immediately. As discussed, it could be a loose connection or an incompatible dimmer. Ignoring it could potentially shorten the life of your light or driver.
- Dimming performance: If your light is dimmable but isn’t performing as expected (e.g., not dimming smoothly, buzzing), re-check dimmer compatibility or consider upgrading your dimmer switch.
- Loose fixture: If the spotlight starts to wobble or feel loose over time, turn off the power and gently re-tighten the mounting screws. Over time, vibrations or slight material movements can sometimes cause fasteners to loosen.
- Discoloration: If the fixture itself starts to discolor, it might be due to excessive heat (rare with LEDs) or exposure to certain chemicals (e.g., strong cleaning fumes). This is harder to fix but keeping the area clean and well-ventilated can help prevent it.
By taking these small steps, you’ll ensure your perfectly installed surface mounted spotlights continue to provide beautiful, reliable illumination for many years. It’s an investment in your home’s aesthetic and functionality, so a little care goes a long way.